Sunday, August 29, 2010

Houten Part VI

Work on the pipe has slowed a bit.  Worked on the stem intermittently for a few days.  But, working on repairs, refurbishing and my own ebay has slowed progress.  Plus getting shop time with Pipin Teipen can be tricky.  Oh yeah, and there was a pipe show in Columbus on about the only day I could get shop time.  Oh well, the show was worth it!  Got to ride over with Wayne, which was a cool road-trip!  Got a couple pipes for ebay at the show and he got a great Peterson and we both got some pipemaking supplies.  Then in searching for a local pipe shop we stumbled upon a WoodCraft store.  For us, this was dangerous.  Let's just say we both got a few more pipe making supplies there.  Yeah, let's just say that...

Work on the stem proved to be quite taxing.  I did, however, learn what not to do.  First, do not fully shape the stem and then think you can easily install an insert.  Not going to happen!  Second, the slot and airway forming on a stem is far more difficult than it would seem.  I started with the standard, comes in every Dremel kit, round slot cutter.  Cut like a dream.  So far, a good looking slot.  Next up, the diamond burrs.  Started working with those, taking bit by bit to shape and before you know it, I had one huge slot, or so I thought.  The way it looked, I figured I had overdone it and ruined my nice stem.  I finished it off with a set of needle files, getting the corners as crisp as I could.  After this, I was done for the evening.  I would tackle it later.

It had turned into 'later' and I was feeling good about finishing the stem!  Fiddled with the slot a little more and left it until Wayne could check it out.  Moving on to the insert I mentioned before.  The one that should have been done about three steps ago.  Yeah.  Oh well, headlong I went.  Marked out the boundary lines for the piece to insert and took it over to the Dremel.  I tried to scribe the lines I needed, but that proved disastrous.  One slip and you have a large gash on your stem.  So I put a thin diamond burr on the MotoTool and began the cuts.  Unfortunately this did almost nothing except heat the stem.  So I changed out the burr for a thin cutting wheel.  Now that worked quite well!  A little too well.  The cuts were pretty wide, but I was committed.  With the pattern rough cut, I defined it with an X-Acto knife and no. 11 blade.  Again, any slip and a nice slice through the stem.

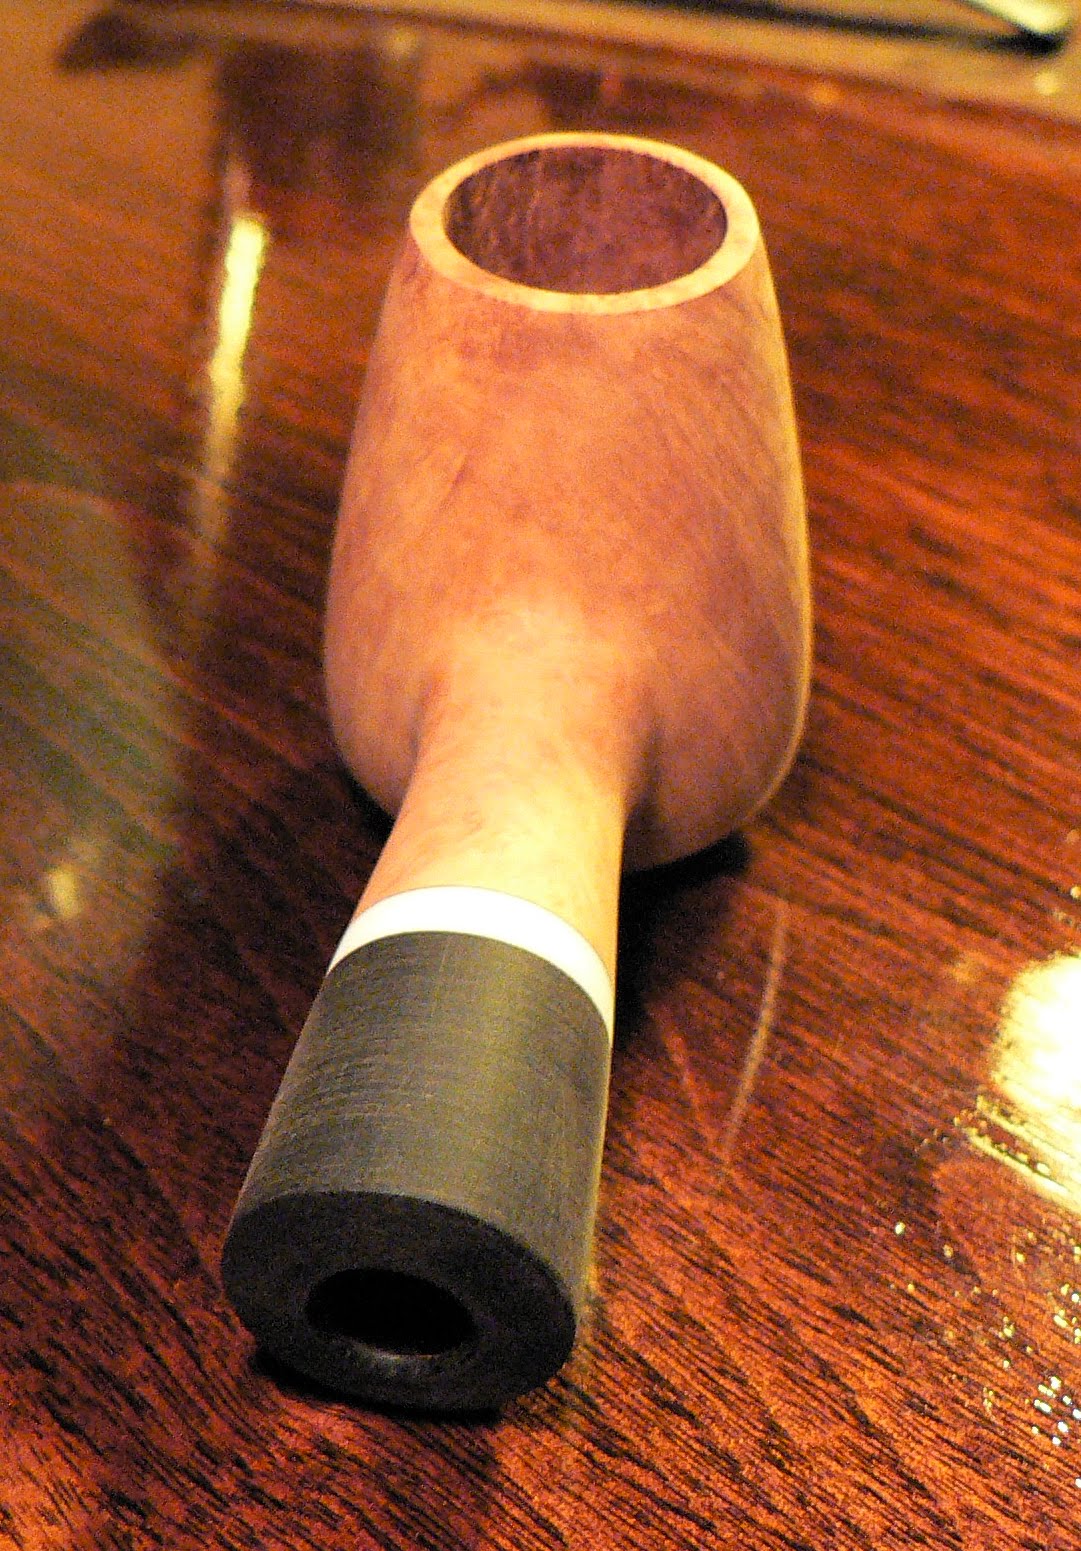
All trimming done, I secured the insert with CA glue.  After it cured I filed the excess down.  Having over-sized cuts, I filled them with CA as well and filed just above flush.  The shape was close and all it needed was fine tuning, so I turned to 400 grit paper.  Using it I got the shape I desired and switched to wet 1200 grit followed by wet 3000.   All scratches removed by the 3000, I polished the stem to a nice shine, then waxed.  The finished stem looks pretty nice and I am pleased.  Although I will not make one the same way again!!

Until next time, happy piping!!

Sunday, August 22, 2010

Houten Part V

Work on the pipe has slowed a bit.  More pipe restoration projects and my ebay have taken the front seat until recently.  I was able to get a bit more accomplished toward the end of the week.  Final stummel shaping and surface prep were up next.  That and some work to the stem.

I was able to get the rim thickness to a point where I was happy and the same for the bottom chamfer on the bowl.  These two elements were fairly tricky and I just wasn't happy with them.  But with a little patience and dedication I was able to get the result I was seeking.

I then turned my attention to the stem, still a fairly hefty block of ebonite.  I took my new belt/disc sander out to my patio, as I didn't want to fill my house with stem dust.  I flipped the switch, gave a manly Tool-Time grunt, and roughed in the basic stem shape.  After cleaning off the sander, returned inside and did some further shaping, getting my desired military bit/fantail form.  I am going to mimic the shape of the shank/extension in the shape of the stem.  I am still trying to figure out what insert I will incorporate in the stem.  I have a couple ideas, but am still undecided.


I just now completed the ebony stain on the stummel.  This is the first step of the 'contrast' approach of finish for the pipe.  I have applied the dark stain and will allow it to penetrate, then buff off the residue and unwanted portion.  After that I will apply a red stain to the remaining lighter areas of the stummel and in doing so, create a nice contrast.  This look will mirror the modeled appearance of the cumberland stem, tying the whole pipe as a congruent unit.  I am very happy with the nice grain throughout the pipe; from the flame on the sides to the beautiful birdseye on the bottom.  It will look great when the pipe is complete!

I can't wait to get out to Wayne's again to buff and finish the stummel and apply the last coat of carnauba!!  But for now, I will continue work on the stem.


Wayne and I will be heading to Columbus, OH next Saturday to the NASPC Pipe Show.  I can't wait!  After heading to the Chicago show in May, I am really looking forward to it.  

Until next time, happy piping!!


Sunday, August 15, 2010

Houten Part IV

I am a stubborn man.  I often do things the hard way, and making this pipe, I stand firm to my obstinate ways.  If you remember, this particular block of briar has two large flaws in it.  As I wrote previously, I was just going to blast/rusticate it and move on.  Done deal.  Not a chance!  I decided to sand through the defects and forge ahead!  It brought a change to my pipe shape and size, but I think it will still be a fantastic pipe.  I think the new shape is a brandeggcano.  However it is classified, I like it!


Working on it throughout the week, I came to a stopping point after sanding through the defects. After removing the flaws I equalied the shape, making it symmetrical.  Well, mostly. The back of the bowl had been flattened a great deal, removing much of the 'brandy' curve I had on it.  The front retained its curvier countenance however.  I did get rid of the flaws too!


Today I spent a portion of the day with Wayne in his shop, finalizing the stummel shape.  The shank had been paid no real attention until today.  Chainsaw and needle files, sand paper rolled up and flat sheet and a pencil to mark the shape.  I took the radius of the shank to bowl transition down to a compact arc.  I know this is one of the defining points making a hand made pipe excellent or just average.  I also know Wayne is a stickler about it and that's why his pipes are some of the best I have seen.  I got the thumbs up from him as he took a break from one of his new creations to inspected my work.


We had a smoke together, discussing one of his latest challenges, building a stem system to fit a single German style stummel.  He will be using a nice piece of cherry wood he obtained from his own front yard.  It will look fantastic when it is completed!  He had some McClellands 2008 Christmas Cheer in a Mastro De Paja on which he had done a stem repair.  I smoked some McClellands No. 25 Virginia a friend sent me in my recently obtained Mario Grandi poker.  I am smoking the same as I write this.  I have learned the pipe is fairly tough on the 'ol jaw!  I think it will be more of a 'holding' pipe.  It smokes quite well and I am pretty happy with it.


Until the next post, happy piping!

Wednesday, August 04, 2010

Houten Part III

Spent the day in record heat (or close to it) today.  The factor that makes it excruciating for me is the nasty humidity!  Oh well, I lived.  Right now we have some fairly ominous thunderstorms rolling through.  Definitely love those!  Well, as long as they don't take out the power.

Continued work on Houten yesterday and was going to do more last night and post pictures, but, I cleverly set the pipe on my toolbox at the MX shop and went to clock out.  Guess what happened next?  Yep.  Walked right out, forgetting the pipe setting proudly on my toolbox!  Oh well, gave me more time to work on restoration projects and ebay pipes I need to get done.

Arrived at work this morning and my pipe was waiting attentively for me.  Okay, well, it was setting right where I left it the evening before.  I didn't get too much time to shape it today, but did accomplish some valuable work.  I am finally gaining on the bowl and stem shape I imagined for the pipe.  The shank will vary slightly from my original drawing, but I believe it will be an improvement.  I am still working on my stem shape, as I am not happy with any rendering yet.  It will come to me.

Oh! One really fantastic thing happened at work today!  I received my Mario Grandi from Italy!  Nice looking poker I had won on ebay from Futurepipes1.  Will be giving it a good run in the next few days :)

For right now, I am working on pipe restorations for a couple guys and my ebay pipes for this weekend.  Smoking Peter Stokkebye's Luxury Bullseye Flake in my first pipe, Czeque.