Saturday, July 31, 2010

Houten Part II

Another Saturday spent with Wayne in the shop.  Work progressed well and I am getting closer to completion, but wait, what happened this week to get me to this point?  I will tell you tales of tragedy and triumph.

The still squared off hunk of briar went with me to my workplace to be fiddled with on breaks and lunches.  Using a small disc sander with 180 grit paper, I roughed in the pipe shape I had drawn on the stummel.  Only having minutes at a time, the shaping progressed very slowly, but progressed nonetheless.  Such beautiful grain revealing itself as I work with this wonderful piece of briar!  Every pass on the disc brought me closer to a first class, top notch pipe, or so I thought.

Thursday rolled around and I had planned on having a close to final brandy shape on the stummel.  Wayne has written me earlier in the week to keep me from gluing the extension into the briar as we had planned because I still had to drill the mortise to receive the stem tenon.  So I rounded the white acrylic portion and set it aside until I could drill it.  Afternoon break rolled around and I began to remove more briar from the stummel hoping to get the main shape done before the end break.  Dust was floating about, piling up on the bench and the pipe was finally taking shape, but, what's this?!  As I sanded down the left side of the bowl, a (large) defect began to appear!  Nooo!!!!  Such a beautiful block to have this huge flaw!  I hoped to sand a little more and have the flaw disappear, but this would not be the case.  The more I removed the larger the  fissure.  So I stopped for the rest of the week, until I could show Wayne and get his input.

So, this morning I ventured to Wayne's and showed him the flaw.  He reminded me the possibility of defects is pretty common when dealing with briar and he has had to deal with it himself.  As has every other pipe maker.  So I thought to myself I have joined the ranks, but in order to be a good maker, I have to salvage what I can and still make a great pipe.  We discussed ways to work around the flaw, as with even more sanding, the defect made itself clear it is going nowhere.  Bouncing ideas back and forth, I decided to try a rustication (and possible additional sandblast) finish most similar to a pair of Svendborg pipes I own.

I had originally decided to use a colored stem of some sort, to be a bright accent to the dark finish and black and white extension I had implemented.  My ideas now shifted slightly with utilizing a rusticated/blasted technique, I will use a less bright, but still colorful cumberland stem.  To highlight the cumberland stem, I thought it would be nice to use a dark black or bright reddish finish on the stummel.  Another brainstorming session with Wayne helped me decide an orangey base stain (the same orange color found in the stem) and then covering that with an ebony.  Then the ebony will be removed on the high points of the rustication to allow the orange to show through, mirroring the effect of the cumberland.  Genius!


I drilled the extension and glued it to the stummel to be shaped later.  I finished what I could of the secondary bowl sanding and will shape the shank and extension after the extension glue has cured.  I was also able to drill the cumberland rod stock and turn a tenon to fit the extension mortise.  I am quite happy with what was accomplished today.


Having not stopped last Saturday to have a smoke, we began the day with a pleasant one!  I think that is what really facilitated our progress today!  Wayne worked on a couple pipes, a nice billiard with great bands on the shank and a bent egg shape.  I can't wait to see both of them in their finished state!  Until next pipe....

Monday, July 26, 2010

Houten

I have begun work on my first pipe, made completely by myself.  No drilled blocks.  No preformed stems.  A chunk of raw cut briar.  Some ebonite rod. A piece of acrylic.  From raw form to finished polish, I will be making this one from start to finish.

I got up late Saturday morning (7/24) and headed for Wayne's house to begin work on my next pipe.  Fought oddly insane traffic for a Saturday morning, but made decent time and was only a half hour late.  The Wayne I speak of is Wayne Teipen who has made quite a few fantastic artisan pipes.  He has opened up his shop and knowledge to me and I jumped at the opportunity!  I am blessed to live so close to a pipe-maker who is willing to assist me as I begin this journey into the art.

Wayne was gracious even though I was a bit behind.  We chatted for a little while and then headed for his shop.  He had already been working a little one of his newest creations when I arrived.  He asked what I wanted to make so I pulled out my drawings of the pipes I hope to make.  I showed him a bent acorn I wanted to be the first venture into making my own pipes.  He liked the shape and told me to transfer it to graph paper, then draw the chamber, draft and tenon holes.  A cool looking pipe, a little less cool to make.  You see, my stem shape and size didn't allow for the straight draft hole.  So, a few pages later and the both of us messing with how to arrange the pipe to fit, we decided to tackle that one later.  I also had drawn a straight brandy/volcano shape pipe with a nice extension and a military style bit.  He thought that would be a good starting place.

After tracing out my design onto graph paper and altering it slightly to make it look a little better, I cut out a template from which I would transfer my design to the block I would select.  With some sage advice, he helped me select a nice block and orient the grain properly.  Using the template from before, I drew the design onto one side of the block.  Next I drew out the differing holes and centerlines.  Now to the drill press.

Beginning with the draft hole, I lined up the block in the machine vise and drilled, having already faced of the block to give myself a flat surface with which to start the hole.  Slow and steady, running the drill down to the depth mark I had made.  First cut done, on to the next, the extension tenon hole.  More lining up and placement, then brad point bit cutting through the briar.  Now the chamber hole.  Reset the block and faced it using the same forstner bit from the draft hole.  Change out the forstner for a 3/4" spoon bit and here we go!  Augered out the briar, keeping the bit cool with compressed air which also removes the briar chips so you can visually check your progress.  Near the breakthrough point where the draft hole meets the chamber hole, the compressed air is applied to the draft hole.  When the auger breaks though, the air will be allowed to pass through from the draft hole which blows out the debris.  This is done to avoid drilling the chamber hole too deep, which can make for a poor smoking experience.  All drilling done, I had just missed the centerlines of the chamber and draft holes slightly, but nothing too horrible.  All-in-all, I am pleased with my first attempt at briar drilling!

Next step was to make the extension which will be glued to the block later in the process.  I decided to use and ebonite extension with a white acrylic accent band.  Chucked up the ebonite in the lathe and turned the tenon to the same diameter I drilled earlier in the briar.  After that, I finish-drilled the draft hole in the extension to match the one in the block.  A couple of slight adjustments to the tenon diameter and it was ready to go.  Now the acrylic band.  Marked out a small piece and began to drill.  A little too much pressure on the acrylic and....snap!  Just as the drill passed through the thickness, the small piece broke in two.  Wayne grabbed another piece, and with a little lighter touch, I had my extension piece.  De-burred the acrylic and glued it to the extension.  Figured that would be a good stopping point for the day as I had to head back home to finish my Ebay sales.


A great day's work complete, I was pretty pleased with the progress.  I can't wait to get back in the shop and do more!

Saturday, July 03, 2010

One Czeque That Won't Bounce

I decided a while back to make my own pipe.  Just short of doing the whole thing myself, I bought a pre-drilled/stemmed carve your own block from my local pipe shop, The Pipe Puffer in Greenwood, IN.  The block was in pretty rough shape having a square shank and bowl.  Of course I started work, forgetting to take a 'before' picture. The poor drilling of the stummel made final sanding difficult as none of the holes were true to, well, anything!  I had been speaking with a full fledged pipe maker, Wayne Teipen, during the whole process, bouncing ideas off of him.  He was most helpful throughout the process of design.
The block took its first cut on a smaller disc sander, a Delta 6" setup with 120 grit paper.  As I roughed in the top of the bowl, the pipe began to direct its shape.  Starting as a general looking 'poker' style pipe with the shank still remaining square, I flattened both top and bottom in parallel.  To leave the fore and aft bowl faces unparalleled seemed to give the pipe an interesting look.  I partly borrowed the idea from a Danish inspired bent 'brandy' shape I had recently seen.  At this point I roughed in the shank the best I could with the disc.  The rest of this part would be done with my Dremel at home.

The shank was probably the hardest decision of the pipe shape.  I wanted to utilize a form that complemented the bowl but was still sleek, as I could envision the shape being almost aerodynamic. I used my Dremel tool, fitted with a flex shaft and a cone shaped carbide cutter, to give form to the shank.  I hoped to mimic the curve of the stem and continue it to the shank, which proved to be a bit tricky.  After the basic form was made with the cutter, I changed it out for a 1/2" fine grit drum and accomplished the final curve I was seeking. I was able to obtain a decent symmetry all around the pipe with only minor nuances of asymmetry.
After shaping the stummel and getting the basic shape of the stem done, I decided I would give sand blasting a go.  I decided on a partial pattern on the stummel/shank to accentuate the pipe's shape.  I learned a great deal during the process and the absolute necessity of precision masking before blasting.  The final result was well worth it though!
I asked Wayne to help with the finish and he told me to take a trip out to his shop.  We put the finishing touches on my pipe there and enjoyed a smoke together.  He showed me the finer points of 'contrast' staining, starting with a very dark base stain, applying it 3 times.  After the base application, over to the red tripoli buffing wheel to remove the dark stain and obtain the desired level of coverage.  I left the blasted sections darker than the smooth surfaces to accentuate the unique blast.  Completing this step, we went back to the stain selection and I picked and orangey-red color for the surface stain.  This took only two applications, then back to the buffing wheel.  This time the white diamond wheel which only polishes and does not remove any finish.  The gloss had begun to shine now and the detailing touches were applied to the stain before giving the pipe a high gloss with the carnauba wax wheel. The stummel looked fantastic! The only part left was the stem.
That night I worked with a piece of white pearlescent acrylic Wayne had given me to use as an insert in the top of the stem.  I decided to install a dot and drilled the stem to accept it.  Completing the final size hole in the stem, I moved to the small piece of acrylic I cut earlier.  Using a drill I spun the outside diameter of the insert to the correct size with a drill bit as my spindle.  Glued the insert in the stem and cut small pieces of aluminum and brass tubing and a small brass rod, to finish off the look I wanted.  Glued those into place and filed the whole lot flush with the stem.  Went through the process of sanding the stem, then a polish and finally a nice coat of carnauba wax.  I decided to name the pipe according to its shape and attributes, the check-mark.  Having come up with the general name idea, I let a good friend come up with an interesting spelling.  Czeque it was!  I will be smoking it with friends for the first time tomorrow in celebration of our great nation's Independence Day!
I am pretty pleased with the result of my first attempt at pipe making!  I am looking forward to the next venture and actually drilling my own block and making a stem from solid rod stock.  Until then...

*Edit 07/04/2010* Wanted to add, I smoked the pipe for the first time today with Peter Stokkebye's Luxury Bullseye Flake, and it was great!  Nice draw and cool smoke, had one small gurgle mid-bowl, but it went away with a little reverse puff.  Turned out to be a great smoker!

    Czeque

  • Style: Mod. Poker/Tankard
  • Material: Briar
  • Stem: Vulcanite
  • Finish: Smooth/Partial blast
  • Group Size: 4
  • Length: 5 5/8"
  • Height: 1 9/16"
  • Bowl Dia.: 1 3/8"
  • Chamber Dia.: 13/16"
  • Chamber Depth: 1 1/8"
  • Weight: 40g


Sunday, February 07, 2010

Briar Buffer

Having written about pipes, I will show a before and after of a pipe I have 'restored'. Typical for most pipes, I will ream the excess cake from the chamber and clean the draft hole. The top of the bowl will have any buildup removed. I restore the stem by removing all the brown or green oxidization and restore it to the original black vulcanite color. I then polish the stem being careful to not round any crisp edges or harm any insignias that may be on it. I clean the stummel (the main body of the pipe existing of the bowl and shank) and polish it and give it a good waxing. For my own pipes and if requested, I will run a 'sweetener' through the pipe.


There is a quick run-down of what I do for my own pipes as well as most pipes I sell on Ebay. The pipe above was done for a friend of mine. He won the pipe in an auction on Ebay and asked if I could clean the pipe for him. This beauty is a Savinelli Punto Oro in a bent prince shape. Be sure to check my listings on Ebay: http://myworld.ebay.com/gearking/

Monday, January 25, 2010

Pipe Cleaners

It has been a long time since my last post. A lot of water, a lot of bridges. Moving along...


I have found I really gravitate to vintage items. You can see in my last post I have grown fond of records. Around that time perhaps before, my memory fails me, I had taken to tobacco pipes. I had always thought they were cool and enjoyed the fragrance, unlike any other form of tobacco. It all started one fateful summer night at a friend's place. Up on the balcony of his place enjoying the calm evening and sunset after having eaten a great meal, he and another of my friends lit up. I was offered and it's history from there. I soon went to my local tobacco shop, Randy's on Lafayette Rd. here in Indy, and got my own kit. I picked out a full bent 'basket' pipe and they supplied all the other tools in the kit I bought.
My first light up with my own pipe was at a bachelor party my friends and I had at my place that fall. Of course I made the rookie mistakes and could hardly get the pipe lit, nor keep it lit. With some practice I got the hang of it. With more practice I learned how to keep a 'cherry' lit in the center, although later I learned it was too hot and the reason I was getting so much tongue bite. I was getting pretty good at building a nominal 'cake' in the bowl too. Being a details person, I truly love the intricacies and for lack of a better term, the intimacy with each pipe.
My affinity for the pipe led me to look in thrift shops and antique stores for old pipes. I was on the hunt for a pipe like Bing Crosby smoked. Throughout my search I have found many variations of pipe I like. This also brought me to getting 'lots' of pipes on ebay and cleaning and selling the ones I didn't care to keep. The process grew and so did my knowledge of pipes. I now list on average 8-12 pipes every Saturday night on ebay. Still a growing hobby and a growing knowledge. I hope to be able to use my creative abilities and make my own soon. For now, I just clean and refurbish. More to come.

Tuesday, January 20, 2009

Vintage

I recently acquired my grandparents' 1965 Zenith record player. A fine example of 60's style with dark wood grain and flashy chrome. The mechanism required some attention and the needle was practically destroyed. Over the past couple of months I have replaced the cartridge and needle and adjusted the tonearm tension to get it to play correctly. The tension may still need to be tweaked a little, but it is now in nominal working condition. I have the benefit of having 4 play speeds: 16, 33, 45 and 78. It is not only great to hear the most popular 33 1/3 RPM vinyls records, but also the older, thicker shellac 78's.

I have obtained many records recently, scouring numerous Goodwill and Salvation Army stores as well as antique outlets and some record shops. I have gotten some steals at each place I've gone, but I'd have to say getting 30 78's of various artists such as Glenn Miller, Benny Goodman, Stan Kenton and Harry James for only $3.00 was probably my best find. I have done a bit of shopping on eBay as well, which has its own jab of excitement. Getting a good deal and beating someone else to get it, what more could a thrifty and competitive guy such as myself ask for?!

In addition to my retail finds, I have a few couple great friends who have seen the enjoyment of my new found pastime and have helped my cause by giving me some of their old vinyl. Having musical friends has been a great experience, learning different things from each. All different but all sharing the same love of music. Along this line of thought, I have come to realize there is a greater connection, a greater intimacy with records. In a world of loading cd's and now mp3's and iPod's I think to some degree we've lost the reverence of music. Now there's nothing tangible, just a little box with ear buds. I have found it exciting to stack a few LP's on my turntable and watch brainchild of some engineer at Zenith work almost flawlessly, dropping records, moving the tone arm to just the right spot and then hearing the warm sound floating from the speakers. A wonderful sound to hear, pops cracks and static included!

Tuesday, December 23, 2008

Extra Credit...

One semester of college under my belt. I took Art Appreciation and CAD Fundamentals this semester and received "A's" in both courses. The work took some getting used to, and the nights of working until at least 1 AM seemed perpetual. Although some assignments were difficult I got into a work rhythm and they proved to be quite rewarding. The work paid off and I have a 4.0 GPA for the time being. I know these were fairly easy courses and work will be more difficult as I move forward, but I am reveling in my success!
I wrote my first research paper on the Prairie School of Frank Lloyd Wright's architectural design career. I had a great editor to help me and got 38 of 33 points available. I took a trip to Chicago with Neil to gain information about Frank Lloyd Wright and his design. I was able to include my own images in my paper which gave me extra credit. The overall available score for the course was 111 and with extra credit I was able to get a score of 135.6. I received a nice note from my Art professor following the course:

"Nathan,

You are the Man!! No worries Mate!! You definitely aced an A. I wish all my students were as prolific, proactive, and throw themselves into their work has you did. I have to say, out of all my ARTH classes (I taught two this semester, over 50 students) you scored the highest of all, and accumulated extra credit on top. I enjoyed your research paper, and your discussion units. Are you a research analyst as your 40/wk job? Do you write books for living? If not, you might look into this! Nathan, I truly enjoyed you as a student, and wish you all the best as you pursue more college classes, and other adventures you take on. You will do well, I can tell..." Steve Lambert

Very encouraging to hear! I am in the process of signing up for Advanced CAD as instructed by my professor, but the system they have indicates I need to take the Technical Graphics course prior. Because I am not seeking their degree for this, I am going to speak with the Chairperson of the Technical Department to see if I can waive this particular course.
I am looking forward to furthering my education and attempting to gain a position at an architectural firm as soon as I am able. Current economy has hampered that goal for the moment.

Saturday, November 01, 2008

Undergrad

Having taken my first mid-term tests last week, I have completed half a semester of my first experience with college. Both midterms went very well, I got 39 of 40 questions correct in my AutoCAD class and I aced my Art History exam. I am pleased with my grades so far but have a couple more tests and my first 'college level' research paper to complete for my art class. I have selected 'Frank Lloyd Wright, and the Prairie School' as my subject. This is fitting to my desire to seek a degree in architecture. I am a bit apprehensive of composing a research paper, but I am certain, in the end, I will do well.
I spent a few hours today at the Crown Hill Cemetery to study a couple of books I have checked out of the downtown public library. I have found the area surrounding James Whitcomb Riley's memorial to be a serene place to read and think. Today proved to be somewhat less tranquil as the memorial saw quite a bit of traffic. Nonetheless, I was able to get some study done and enjoy the unseasonably warm day.

Sunday, July 20, 2008

Showing some leg...

Another great weekend of culinary endeavors!  

I joined Joel, Heather and their daughter and went to the City Market in downtown Indy.  Such a great place for fresh foods.  Joel had his eye on a Greek eatery in the far corner of the Market,  and we all agreed that would hit the spot.  Quickly after ordering, they explained they only would accept cash, so I hurried off to the nearest ATM to obtain a different form of 'dough'.   We all ordered gyros, but I added an order of baklava.  Serving Pepsi products, I naturally
 ordered my drink of choice: Mountain Dew.  Sadly, they were out of Mountain Dew, so I settled for an orange soda.  Fortunately for me, the rest of the meal made up for the lack of Dew.  The gyros were excellent and the baklava was exquisite! 
  Having finished lunch, we visited Moody Meats and got a beautiful leg of lamb to make for dinner.  We also utilized a coupon Moody offered in their brochure: if you buy $10.00 or more, they give you 1 pound of hickory smoked bacon! 
 I can't wait to use the bacon for another cooking venture.
  
  After the purchase at Moody, we returned to Joel and Heather's, as she had a baby shower to attend.  Joel and I t
hen ventured to Whole Foods to pick up the rest of the ingredients for our meal.  
One great thing about Whole Foods is the tasty samples to munch on while browsing the store! 
 Sometimes the most simple things in life are the best!


I was mainly involved in the prep work as Joel didn't need much help to prepare the courses.  We began the dinner with pita bread, sliced into strips and baked with oil and salt to flavor, served with artichoke hummus and baba ghanoush.  For the most part, I snacked on the 'appetizer' while Joel finished the main course!  
Like I said, Joel had the cooking under control.  Needless to say the lamb was incredible!  Beside the lamb was a nice butter leaf lettuce salad with a caesar dressing, new potatoes mashed with a hint of rosemary, and some colorful kidney beans.  We happily ate, and were quite full after.  Another fine meal presented by the culinary masters!

Sunday, July 06, 2008

Yes Chef!

A friend of mine, Joel, and I have been enjoying the great television programming on Monday and Tuesday nights.  'American Gladiators', 'Wipeout', and 'I Survived A Japanese Gameshow' to name a few.  But, being 'foodies', we are drawn most to the reality cooking show 'Hell's Kitchen' hosted by Gordon Ramsay.  It has been one of Joel's interests to cook Chef Ramsay's cookbook in its entirety.  So I decided to help him in his first venture.  I may have promise as a 'sous chef'!   

 
 I sat in Joel and Heather's apartment Saturday night having enjoyed three great dishes we made from Chef Ramsay's cookbook.  We were able to replicate his Risotto with Wild Mushrooms and Baby Squash (we used Acorn Squash) Stuffed with Mushrooms and Artichokes.  Both main dishes turned out wonderfully!  I'm not a big fan of mushrooms per se, but I loved both items. The acorn squash was cooked perfectly, and the butter sauce that topped the medley was excellent!  The risotto was a welcome companion to the squash.  The flavors complemented each other extremely well.
  After the dinner we made Chocolate Fondants, and watched the movie Drillbit Taylor.  The fondants were quite rich and the movie was a hit.  At the end of the night, bellies were full and compliments were paid to the chefs.  Overall, a great evening.  Food is a wonderful thing!

Monday, January 07, 2008

A Takeoff And A Landing...

  A lot has transpired since my last entry; to say the least!!  10 months later, life's a bit different...
Frustrations and life-lessons learned, after a half a season last year in the ChampCar World Series, I decided to leave auto racing and try my hand in another field: aircraft maintenance. Working on aircraft is actually very similar to working on race cars, but has brought some challenges and opportunities to grow. I actually find the different cars I have worked on far more difficult than most aircraft.
  
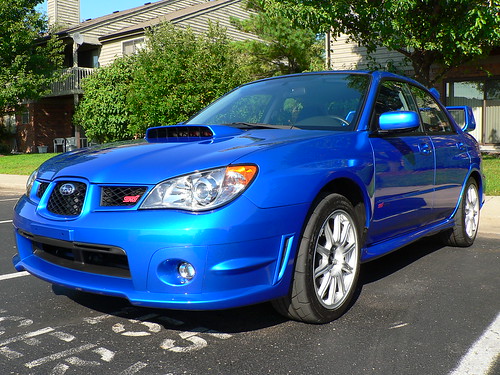
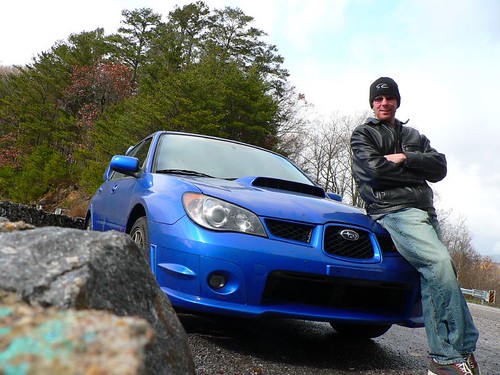
  The jump from racing also brought a parting  with my 2006 Subaru Sti. I was able to get into another Suby; a year older, double the miles and half the payment! My new 2.5 RS lacks, well, everything that was cool on Sarah (my Sti), but is exactly what I need.


I do like the color, andI receive much 
less grief about it being a 'shopping cart'!  In fact, I don't think anyone I know has used this nomenclature for Hagar (the other car). 


 This change also gave me more time at home with friends and likewise time to see concerts I haven't been able to attend because of travel.  I had the pleasure of going to see The Family Values TourRush, Genesis, Regina Spektor, Brandi Carlile, Bill Cosby, the John Butler Trio, and finally Robert Fripp and the League of Crafty Guitarists.   All of the artists were absolutely phenomenal!!  What a blessing to have the chance to take in such great talent!  


Flyleaf and Korn during the 'Family Values' tour at the Verizon Wireless Center in 
Indianapolis, IN


            Genesis in Columbus, OH                                         The John Butler Trio in Indianapolis, IN


  Bill was spot on and absolutely hilarious!  He never missed a beat and was as animated as he has ever been!  He interacted with the audience quite a bit, and even made fun of the Bears, as they were competing in a game during his show.  I sure am glad I got to go! 
I realize while I'm typing, how much I enjoy driving and road trips.  I guess it fits, being I spent most of my life in a car of some sort traveling around the world.  I guess it's just in my blood!   

 More blogs to come, and I doubt it will be another 10 months!

Tuesday, March 13, 2007

And So It Begins...

Work….Testing….Much craziness. Test number three: Laguna Seca Raceway, Monterey California. Sun and a little warmth, but no love. A beautiful racing circuit, set against the backdrop of a state park. An area that used to be a military base, and some portions are still ‘off-limits’ with signs posted ‘Live Ammunition’ and areas riddled with unspent cartridges. Still, it is quite picturesque. We had a nice hotel and a beautiful view of Monterey Bay, but sorry to say, we had no opportunity to enjoy it as we left in the morning darkness and returned every night after the sun had set.

We were testing two cars, two drivers this test. Robert Doornbos and Zsolt Baumgartner were the pilots of our two entries. This was Zsolt’s first drive in the new Panoz chassis. He did well, but unfortunately he had a couple of ‘offs’ and the second shunt finished his test altogether. Robert, with about twenty minutes of track time left on the second day, had an almost identical crash. So after loading the two crashed cars onto the transporters, we had to wait for the end of the ‘standing start’ practice before our fuel tanks could be emptied. Sadly, this meant we ended up sitting around two almost loaded transporters for over an hour. We finally got the fuel tanks loaded, the transporters closed and ready for the return home. Not the greatest of ways to finish pre-season testing.

After we all took quick showers and packed up, our van made the trip to San Francisco for the return flight to Indy. It was difficult to remain conscious and I think I nodded off a couple of times on the ride to the airport. The long awaited stop at In-N-Out Burger helped though! A Double-Double, ‘Animal Style’ combo and a chocolate shake, a thing of beauty…and tastiness!! You gotta get a stylin t-shirt too; that goes without saying.

We had a 12:01 am flight on Northwest that stopped in Minneapolis/St. Paul at 6:27 am with a more than three hour layover. Most everyone took the opportunity to sprawl out and sleep. I could not sleep so I took pictures. Due to the overwhelming amount of, and severity of the threats I received, I have chosen not to post these photos. We finally arrived home at 12:43 pm the next day, having a delay receiving our bags. I think we left the airport at 1:30, but we were finally home!

Sunday, January 21, 2007

Eager Anticipation...

Back again. A new racing season has rolled around once more. This one brings great promise for my team. Before the last part of the 2006 season, there had been rumors of a Formula 1 team wanting to purchase and take over operation of an Indianapolis based Champ Car team. We are one of 5 teams in Indy; the only remaining team on Gasoline Alley.
After the final race of the '06 season down in Mexico City, our team owner had a meeting alluding to the fact we had been chosen for the Minardi Formula 1 team to purchase. Just before our Christmas party, the official announcement was made, and we were officially to be 'Minardi Team USA'! We got to meet our new team owner, Paul Stoddart, and a few key players of Minardi at the party. We are all very optimistic for the 2007 Champ Car season.

The new chassis arrived for the teams just before the end of December. Teams took delivery of their new cars at the Champ Car world headquarters here in Indy. The car manufacturer (Elan Motorsports) was behind on production, therefore each team only received one chassis at the first delivery. Just one chassis would provide plenty of work for the coming weeks; preparing for the first test in Sebring, Florida.

Receiving the newest livery to the team, we dissected the car. Inspecting the new design, the shop was abuzz with excitement. The lines, the form, emulating the sleekness of a Formula 1 chassis. The fit and finish from the factory was good. Cars, in years past, have been somewhat of a nightmare to build and had required much more work to bring them to racing level. All cars will need preparation, but the newer constructions have lent themselves to better builds.
The weeks of preparation brought extended shop hours to accomplish all the aspects of a new car build. As stated earlier, the newer chassis designs require less work, so we have not had a very hard build. Deadlines are met, but toward the end of a build, the little things cause the biggest headaches. Not having all the parts, and having to fit parts because the design and the actual part don't coincide are a couple of these headaches.

Last night was the ubiquitous 'late night', having the deadline of actually loading the car on the transporter to leave this morning for the first test. We loaded the car and finally left the shop just minutes after 11:00 pm. A great sense of completion and satisfaction comes over you as you see the racecar rolled onto the upper deck of the transporter. Also, a great sense of relief!

As I write now, the transporter is on its way to sunny Florida. Part of the team is traveling Monday to run a 3 day test. I wasn't selected to make the trip, so I will remain and wait for our next car to be delivered - supposedly tomorrow. Many on the team doubt it will make this deadline! As the first car runs in Sebring, those who have back home will begin preparing our second livery. Time is rushing toward the first race, and I'm sure we'll have even later nights and tighter deadlines. The price of 'big-time auto racing'!

Friday, December 29, 2006

Deals Gap 2006 - The Best Road Trip!

At last, the end of the racing season! (I know, I'm a few months late...) After the last race of the season our benevolent team allows us a week off as the shop closes for that time. A great time so sit back, relax and reflect on the year's happenings? No way! This means 'Road Trip'! A road trip I had been looking forward to for half the season. Sam (one of the mechanics on our team who happens to own a Mini Type 'S') had said he was going to Deals Gap, and gave me a dvd of his previous trip. The main section, called the 'Dragon's Tail', has 318 curves over the short span of 11 miles. This looked like great fun, and being a racer at heart, I couldn't pass up the opportunity to take my newly purchased '06 Subaru STI to have some of that 'great fun'!
With all the anticipation behind, the end of the season finally came and we journeyed south. Meeting at the Greenwood exit on I-65 S, we had breakfast and began the trip. Overcast and sprinkles was the beginning, however, most of the trip down gave us a deluge of rain. Yay. 6 hours of skating around in rain on the freeway. If that doesn't say 'great fun', I don't know what does!
We got to Knoxville in the evening and planned our drive for the following day. Morning. A brand new day, a fresh start! Get ready, shake off the sleep and open the curtains and.......more rain...... Great. What a lovely surprise. The rain did not cease. We managed to make our pilgrimage down Hwy. 129 and had brief moments of dry spots. Despite the rain we had 'great fun' and found many things which were quite humorous along the drive. One of which was, after all the preparation, I missed an exciting portion of driving as the camera wasn't recording. Mr. Technology here.
Alright! Day two! Started out great! Sam went the wrong direction on I-40, but we righted ourselves and went on. We got to the exit for Hwy. 129 and what did we find? More rain....and a lot of fog added! This wasn't funny anymore, especially for Sam. His car doesn't handle well in wet conditions, and that's all we had! Apparently, neither does mine. Well, the car does - I don't. I had, as we say in the racing world, an incident. No harm, no foul; I just spun (check the video below). Weee! We trudged through the end of day two, and made our way back to the hotel.
Day 3. Our return home. Hmm...I wonder what the weather will bring? Wait....what's this? Sunshine?! Yeah....great. Sunshine for the trip home! Of course, you know what that meant. "I wonder what the 'Dragon's Tail' is like?" Needless to say, we left the 'Gap' around noon! Wonderful sunshine brought dryness and traction to the drive allowing us to 'rip it up'! I foresee many trips to a dry 'Dragon's Tail' in my future!
The trip home was good with no incidents, very uneventful and we made great time! ;-) Cannot wait to go back, and maybe infect more friends with the dragon's venom! Until then enjoy the video...