Showing posts with label Briar. Show all posts

Tuesday, September 14, 2010

Coachman

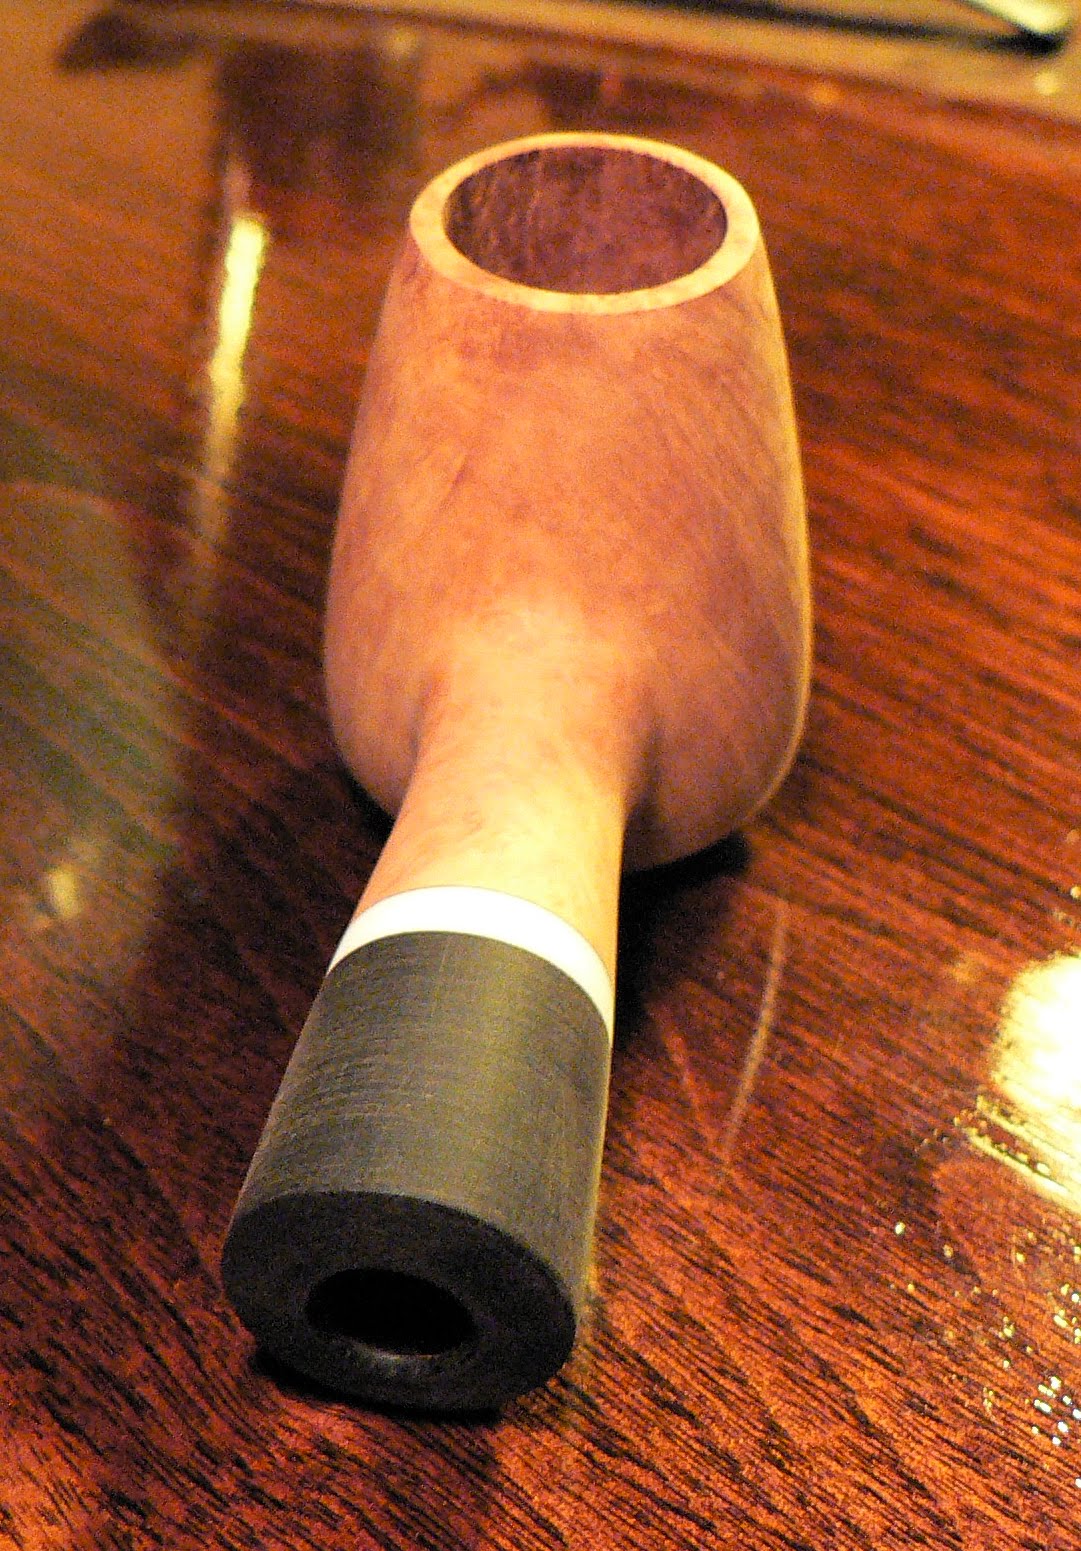
I have begun working on my second pipe, a bent acorn.  Got a promising piece of briar from which to shape its form!!  I am 2 days into it now and so far so good!  The block showed approximately 75% straight grain in its raw form.  It has kept fairly true as I have made dust out of it.
Had Friday off, so traveled out to Wayne's shop at about 9 in the morning.  Shot the breeze a bit when I got there, talked about restorations I was doing, stems I was making/refitting, and looked at new pipe projects.  I had been discussing this particular pipe with Wayne for a few weeks now and dove right in!  Made my template and transfered the shape to the untouched briar block, making a couple corrections to my original design.  Drilled the draught hole, and I was committed now!  Faced and drilled the mortise to accept the stem, yet to be made.
                          
Next step was to drill the tobacco chamber, and for this shape a conical bit must be used.  I had previously purchased 2 spade bits and ambitiously ground them to a conical shape and checked their hole-making ability on a good 'ol 2X4.  Worked like a champ on the soft 2X4, but as I began to drill the briar, it wasn't looking as nice.  I could see on the bit where it was cutting and where it wasn't.  So, over to the disc/belt sander to 'touch-up' my 'Nate-Made' bit.  Just a little touch here, and one there.  Back in the drill press, and fired it up.  Worked perfectly!  Made a really nice, smooth chamber!  Only thing left is to get the depth of the chamber right.  I grabbed the air nozzle and applied pressure to the mortise/draught hole, a tip made known to me by Wayne.  This is done so you don't 'over-drill' the chamber too deep and is a big help!  Air pressure applied, I removed more briar and as I was pulling out the bit to remove a bunch of briar shavings, I heard a horrible sound...the sound of the bit tearing the wood away from the top of the chamber!  Turns out I don't know my own strength.  I had pushed hard enough on the block with the nozzle I had tipped it slightly in the vise.  Fortunately, the damage was small and will be easily fixed later.  I finished the chamber drilling, starting with a puff of dust, to the last pass perfectly lined up with the draught hole and at the proper depth.  I am pretty sure I did the happy dance after that process was complete!

Now to the lathe.  Cut off a chunk of ebonite rod and chucked it in the meaty jaws of the Rikon lathe.  Next I drilled the draught hole with a tapered bit and finished with a straight 1/16" bit.  Next in the process is cutting the tenon.  Wayne had recently purchased a high quality turning chisel for use with his Rikon and this process.  I messed around on with the procedure a bit, fiddling with spindle speeds.  I found the right speed where the chisel cut nicely and began.  Unfortunately, the razor sharp chisel cut too nicely and I turned the tenon on a taper and far too small.  Okay, start over.  This time with more caution. Tada!!  A nicely cut tenon.  And fortunately, Wayne was able to use the chunk I had ruined for my pipe.  He removed the junk tenon and made a new one, and voila, a stem for the rhodesian he was making!
So now, drilled stummel and fitted stem, next is rough shaping.  To the belt disc sander I traveled.  First section to be removed was the forward of the bowl.  Then I roughed in the shank.  Bowl sides up next and some fine tuning (if you can call it that) of the rough shape.  Done with that, I needed to shorten the tenon as I had made it slightly on the long side, so I buzzed a little off.  Still too long, buzzed a little more.  I'm not sure when I realized the tenon was getting pretty short compared to its origin, but I soon realized I had 'buzzed' too much off.  Arrggghhh!!!  Well, I will just shorten the shank a bit, easy enough right?  In theory on paper it's easy, but in practice it takes forever and if you want a nice stem/shank fit, it can be painful to accomplish.  But I persevered and re-attained a nice stem/shank fit with the proper mortise/tenon fit internally.  One for the books and never to do again! I was done for the night.
On Saturday I went back in the afternoon.  More conversations, discussions of pipes and the like and nearly every other subject in between.  More shaping to Coachman and more work on the replacement stem I was making.  I think I left around 9:30PM and I am sure Wayne was happy to get rid of me!  I can't wait to get back and work on more epic pipes! Until then, happy piping!

Sunday, September 05, 2010

Houten - The Finale!

After base ebony stain, ready for final stain and finishing
Worked this week to complete Houten and finished on Saturday evening.  I will most likely give it a proper buff at Wayne's but for now I am happy enough with the results to post pictures.

With the stem complete, the last step was finishing the stummel.  I had the base ebony coat on for the contrast look I was trying to achieve.  After polishing and prepping for the actual contrast color, I mixed the red stain solution and donned my rubber gloves.  Wet the rag with the red stain and went to town on the stummel!  After it dried, another buff and then check the finish color.  Far too light, almost pink.  Bummer. Re-mix the solution with a touch more red, some orange and a bit of silver/grey.  Re-applied and the color started to come into hue.  Dried, buffed, re-applied.  I think I did this 4 or 5 times before the color was as I liked it.  But wait, what's this?!  I had a dent on the left side of the bowl I hadn't seen!  Ah, the aggravation!  I tried the 'steam' method to remove it, but that helped very little.  Grrr....  All that and I now have to sand the finish around the dent.  Oh well.  Sanded, reapplied the ebony and red stains and matched it up to the rest of the finish.  No harm, no foul.

Now for the final polish before applying wax.  I guess I should back up a bit.  I recently went to Harbor Freight and snagged a 'polishing kit' with two 3" buffing wheels that fit into a drill.  I used one to buff with the 'red tripoli' polish to prepare for stain and one to try out for applying carnauba wax on some other restoration pipes I am doing to check its usefulness.  I was very satisfied with the results for both wheels, but now had a problem.  I need a third wheel for applying 'white diamond' polish as a final polish before going for the wax.  So, I stopped my work for a while and took a trip to Menards.  Had a hard time finding any polishing wheels, but finally found an employee to direct me, to the hardware section.  Three aisles in, voila!  A flannel polishing wheel.  This one needed a separate arbor, and I was on my way.


Back home, I had promised to help a new neighbor move in after I returned.  That didn't take too long and I was back to pipe work.  Chucked up the new white diamond wheel, buffed, and how did the pipe shine!  Thrilled about the shine I went headlong into applying the wax.  Starting with my Dremel and a felt wheel I applied the wax, almost smearing it on.  Moved in sections around the pipe, applying and smoothing.  After the whole stummel was waxed, I took the wax buffing wheel I mentioned previously and 'dry buffed' for the final gloss.  And wow did it gloss!

I removed the little bit of stain inside the smoking chamber and final sanded it and wiped the whole pipe with a buffing cloth.  Now to the pictures!  These are quick snapshots I took to post on CPS and here, I will be taking better shots for my website after the final buff on Wayne's lathe.

I am very pleased with the color and contrast, I was trying to match the combination of black and red in the cumberland stem, and I think I got it!  The flame grain is warm and flows over the pipe nicely.  The birds-eye grain on the bottom of the bowl and shank is fantastic!  Two pipes in and I'm hooked!
Until the next pipe making experience, happy piping! 

Sunday, August 22, 2010

Houten Part V

Work on the pipe has slowed a bit.  More pipe restoration projects and my ebay have taken the front seat until recently.  I was able to get a bit more accomplished toward the end of the week.  Final stummel shaping and surface prep were up next.  That and some work to the stem.

I was able to get the rim thickness to a point where I was happy and the same for the bottom chamfer on the bowl.  These two elements were fairly tricky and I just wasn't happy with them.  But with a little patience and dedication I was able to get the result I was seeking.

I then turned my attention to the stem, still a fairly hefty block of ebonite.  I took my new belt/disc sander out to my patio, as I didn't want to fill my house with stem dust.  I flipped the switch, gave a manly Tool-Time grunt, and roughed in the basic stem shape.  After cleaning off the sander, returned inside and did some further shaping, getting my desired military bit/fantail form.  I am going to mimic the shape of the shank/extension in the shape of the stem.  I am still trying to figure out what insert I will incorporate in the stem.  I have a couple ideas, but am still undecided.


I just now completed the ebony stain on the stummel.  This is the first step of the 'contrast' approach of finish for the pipe.  I have applied the dark stain and will allow it to penetrate, then buff off the residue and unwanted portion.  After that I will apply a red stain to the remaining lighter areas of the stummel and in doing so, create a nice contrast.  This look will mirror the modeled appearance of the cumberland stem, tying the whole pipe as a congruent unit.  I am very happy with the nice grain throughout the pipe; from the flame on the sides to the beautiful birdseye on the bottom.  It will look great when the pipe is complete!

I can't wait to get out to Wayne's again to buff and finish the stummel and apply the last coat of carnauba!!  But for now, I will continue work on the stem.


Wayne and I will be heading to Columbus, OH next Saturday to the NASPC Pipe Show.  I can't wait!  After heading to the Chicago show in May, I am really looking forward to it.  

Until next time, happy piping!!


Sunday, August 15, 2010

Houten Part IV

I am a stubborn man.  I often do things the hard way, and making this pipe, I stand firm to my obstinate ways.  If you remember, this particular block of briar has two large flaws in it.  As I wrote previously, I was just going to blast/rusticate it and move on.  Done deal.  Not a chance!  I decided to sand through the defects and forge ahead!  It brought a change to my pipe shape and size, but I think it will still be a fantastic pipe.  I think the new shape is a brandeggcano.  However it is classified, I like it!


Working on it throughout the week, I came to a stopping point after sanding through the defects. After removing the flaws I equalied the shape, making it symmetrical.  Well, mostly. The back of the bowl had been flattened a great deal, removing much of the 'brandy' curve I had on it.  The front retained its curvier countenance however.  I did get rid of the flaws too!


Today I spent a portion of the day with Wayne in his shop, finalizing the stummel shape.  The shank had been paid no real attention until today.  Chainsaw and needle files, sand paper rolled up and flat sheet and a pencil to mark the shape.  I took the radius of the shank to bowl transition down to a compact arc.  I know this is one of the defining points making a hand made pipe excellent or just average.  I also know Wayne is a stickler about it and that's why his pipes are some of the best I have seen.  I got the thumbs up from him as he took a break from one of his new creations to inspected my work.


We had a smoke together, discussing one of his latest challenges, building a stem system to fit a single German style stummel.  He will be using a nice piece of cherry wood he obtained from his own front yard.  It will look fantastic when it is completed!  He had some McClellands 2008 Christmas Cheer in a Mastro De Paja on which he had done a stem repair.  I smoked some McClellands No. 25 Virginia a friend sent me in my recently obtained Mario Grandi poker.  I am smoking the same as I write this.  I have learned the pipe is fairly tough on the 'ol jaw!  I think it will be more of a 'holding' pipe.  It smokes quite well and I am pretty happy with it.


Until the next post, happy piping!

Wednesday, August 04, 2010

Houten Part III

Spent the day in record heat (or close to it) today.  The factor that makes it excruciating for me is the nasty humidity!  Oh well, I lived.  Right now we have some fairly ominous thunderstorms rolling through.  Definitely love those!  Well, as long as they don't take out the power.

Continued work on Houten yesterday and was going to do more last night and post pictures, but, I cleverly set the pipe on my toolbox at the MX shop and went to clock out.  Guess what happened next?  Yep.  Walked right out, forgetting the pipe setting proudly on my toolbox!  Oh well, gave me more time to work on restoration projects and ebay pipes I need to get done.

Arrived at work this morning and my pipe was waiting attentively for me.  Okay, well, it was setting right where I left it the evening before.  I didn't get too much time to shape it today, but did accomplish some valuable work.  I am finally gaining on the bowl and stem shape I imagined for the pipe.  The shank will vary slightly from my original drawing, but I believe it will be an improvement.  I am still working on my stem shape, as I am not happy with any rendering yet.  It will come to me.

Oh! One really fantastic thing happened at work today!  I received my Mario Grandi from Italy!  Nice looking poker I had won on ebay from Futurepipes1.  Will be giving it a good run in the next few days :)

For right now, I am working on pipe restorations for a couple guys and my ebay pipes for this weekend.  Smoking Peter Stokkebye's Luxury Bullseye Flake in my first pipe, Czeque.

Saturday, July 31, 2010

Houten Part II

Another Saturday spent with Wayne in the shop.  Work progressed well and I am getting closer to completion, but wait, what happened this week to get me to this point?  I will tell you tales of tragedy and triumph.

The still squared off hunk of briar went with me to my workplace to be fiddled with on breaks and lunches.  Using a small disc sander with 180 grit paper, I roughed in the pipe shape I had drawn on the stummel.  Only having minutes at a time, the shaping progressed very slowly, but progressed nonetheless.  Such beautiful grain revealing itself as I work with this wonderful piece of briar!  Every pass on the disc brought me closer to a first class, top notch pipe, or so I thought.

Thursday rolled around and I had planned on having a close to final brandy shape on the stummel.  Wayne has written me earlier in the week to keep me from gluing the extension into the briar as we had planned because I still had to drill the mortise to receive the stem tenon.  So I rounded the white acrylic portion and set it aside until I could drill it.  Afternoon break rolled around and I began to remove more briar from the stummel hoping to get the main shape done before the end break.  Dust was floating about, piling up on the bench and the pipe was finally taking shape, but, what's this?!  As I sanded down the left side of the bowl, a (large) defect began to appear!  Nooo!!!!  Such a beautiful block to have this huge flaw!  I hoped to sand a little more and have the flaw disappear, but this would not be the case.  The more I removed the larger the  fissure.  So I stopped for the rest of the week, until I could show Wayne and get his input.

So, this morning I ventured to Wayne's and showed him the flaw.  He reminded me the possibility of defects is pretty common when dealing with briar and he has had to deal with it himself.  As has every other pipe maker.  So I thought to myself I have joined the ranks, but in order to be a good maker, I have to salvage what I can and still make a great pipe.  We discussed ways to work around the flaw, as with even more sanding, the defect made itself clear it is going nowhere.  Bouncing ideas back and forth, I decided to try a rustication (and possible additional sandblast) finish most similar to a pair of Svendborg pipes I own.

I had originally decided to use a colored stem of some sort, to be a bright accent to the dark finish and black and white extension I had implemented.  My ideas now shifted slightly with utilizing a rusticated/blasted technique, I will use a less bright, but still colorful cumberland stem.  To highlight the cumberland stem, I thought it would be nice to use a dark black or bright reddish finish on the stummel.  Another brainstorming session with Wayne helped me decide an orangey base stain (the same orange color found in the stem) and then covering that with an ebony.  Then the ebony will be removed on the high points of the rustication to allow the orange to show through, mirroring the effect of the cumberland.  Genius!


I drilled the extension and glued it to the stummel to be shaped later.  I finished what I could of the secondary bowl sanding and will shape the shank and extension after the extension glue has cured.  I was also able to drill the cumberland rod stock and turn a tenon to fit the extension mortise.  I am quite happy with what was accomplished today.


Having not stopped last Saturday to have a smoke, we began the day with a pleasant one!  I think that is what really facilitated our progress today!  Wayne worked on a couple pipes, a nice billiard with great bands on the shank and a bent egg shape.  I can't wait to see both of them in their finished state!  Until next pipe....

Monday, July 26, 2010

Houten

I have begun work on my first pipe, made completely by myself.  No drilled blocks.  No preformed stems.  A chunk of raw cut briar.  Some ebonite rod. A piece of acrylic.  From raw form to finished polish, I will be making this one from start to finish.

I got up late Saturday morning (7/24) and headed for Wayne's house to begin work on my next pipe.  Fought oddly insane traffic for a Saturday morning, but made decent time and was only a half hour late.  The Wayne I speak of is Wayne Teipen who has made quite a few fantastic artisan pipes.  He has opened up his shop and knowledge to me and I jumped at the opportunity!  I am blessed to live so close to a pipe-maker who is willing to assist me as I begin this journey into the art.

Wayne was gracious even though I was a bit behind.  We chatted for a little while and then headed for his shop.  He had already been working a little one of his newest creations when I arrived.  He asked what I wanted to make so I pulled out my drawings of the pipes I hope to make.  I showed him a bent acorn I wanted to be the first venture into making my own pipes.  He liked the shape and told me to transfer it to graph paper, then draw the chamber, draft and tenon holes.  A cool looking pipe, a little less cool to make.  You see, my stem shape and size didn't allow for the straight draft hole.  So, a few pages later and the both of us messing with how to arrange the pipe to fit, we decided to tackle that one later.  I also had drawn a straight brandy/volcano shape pipe with a nice extension and a military style bit.  He thought that would be a good starting place.

After tracing out my design onto graph paper and altering it slightly to make it look a little better, I cut out a template from which I would transfer my design to the block I would select.  With some sage advice, he helped me select a nice block and orient the grain properly.  Using the template from before, I drew the design onto one side of the block.  Next I drew out the differing holes and centerlines.  Now to the drill press.

Beginning with the draft hole, I lined up the block in the machine vise and drilled, having already faced of the block to give myself a flat surface with which to start the hole.  Slow and steady, running the drill down to the depth mark I had made.  First cut done, on to the next, the extension tenon hole.  More lining up and placement, then brad point bit cutting through the briar.  Now the chamber hole.  Reset the block and faced it using the same forstner bit from the draft hole.  Change out the forstner for a 3/4" spoon bit and here we go!  Augered out the briar, keeping the bit cool with compressed air which also removes the briar chips so you can visually check your progress.  Near the breakthrough point where the draft hole meets the chamber hole, the compressed air is applied to the draft hole.  When the auger breaks though, the air will be allowed to pass through from the draft hole which blows out the debris.  This is done to avoid drilling the chamber hole too deep, which can make for a poor smoking experience.  All drilling done, I had just missed the centerlines of the chamber and draft holes slightly, but nothing too horrible.  All-in-all, I am pleased with my first attempt at briar drilling!

Next step was to make the extension which will be glued to the block later in the process.  I decided to use and ebonite extension with a white acrylic accent band.  Chucked up the ebonite in the lathe and turned the tenon to the same diameter I drilled earlier in the briar.  After that, I finish-drilled the draft hole in the extension to match the one in the block.  A couple of slight adjustments to the tenon diameter and it was ready to go.  Now the acrylic band.  Marked out a small piece and began to drill.  A little too much pressure on the acrylic and....snap!  Just as the drill passed through the thickness, the small piece broke in two.  Wayne grabbed another piece, and with a little lighter touch, I had my extension piece.  De-burred the acrylic and glued it to the extension.  Figured that would be a good stopping point for the day as I had to head back home to finish my Ebay sales.


A great day's work complete, I was pretty pleased with the progress.  I can't wait to get back in the shop and do more!